
History
Moroccan Zellige
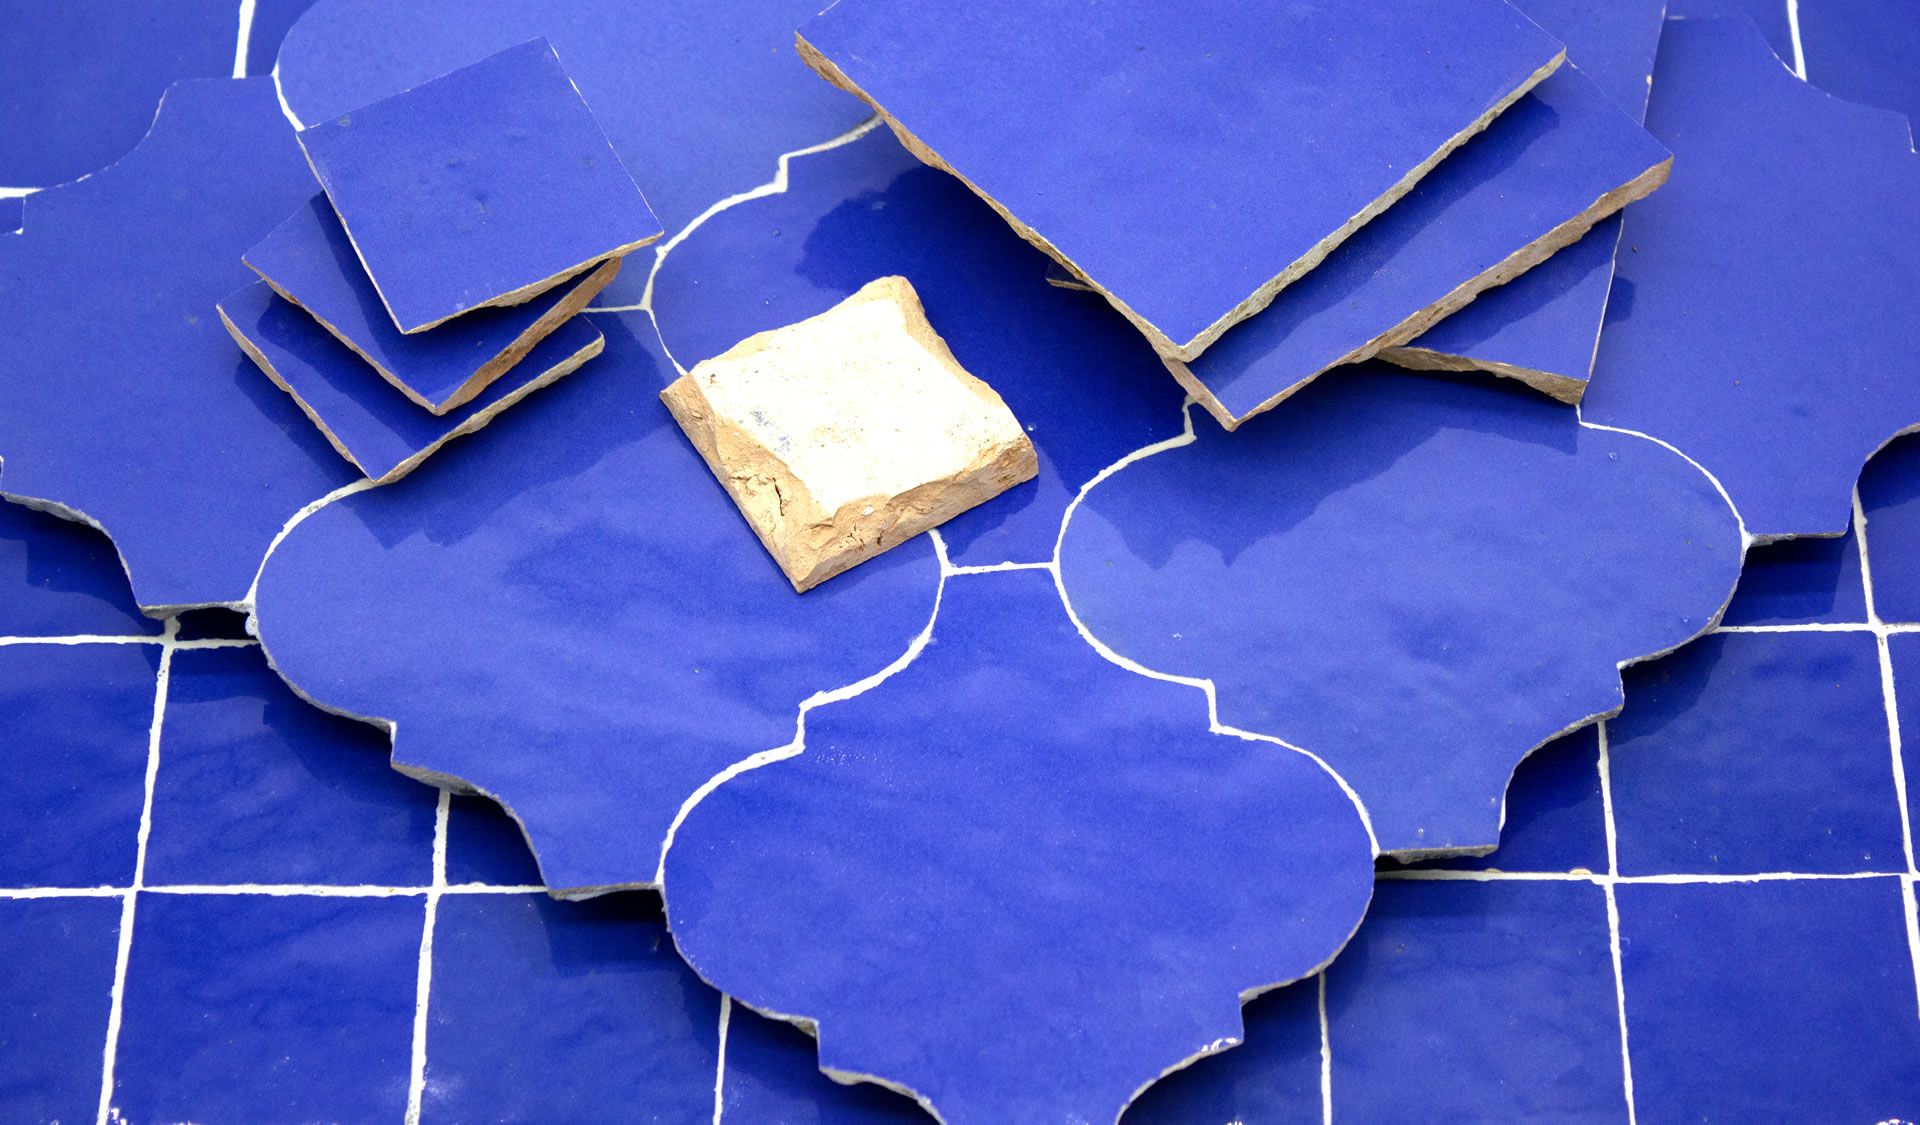
The production of zellige requires true craftsmanship. The maâlems (master craftsmen) start learning this niche process as apprentices. Historically used in geometric and floral shapes in the most beautiful palaces, zellige is only now becoming more widely available. Our craftsmen start with raw clay which they soak in water and hand filter for impurities. At this point, the clay becomes a soft, malleable substance that can be placed into various molds. These pieces are then placed side by side and left to dry in the bright Moroccan sun. The tiles are flattened and shaped by hand and left to dry further. Each tile is hand dipped in glaze and then methodically placed in an earthen kiln. Heat is distributed unevenly throughout the kiln which gives zellige gorgeous variations. Every tile is an expression of the artisan’s work that day—beautifully imperfect and unique. Lastly, the tiles are glazed and cut to perfection. Each tile is a piece of art in its own right.
The Techniques
How It is Made
For zellige, the highest quality of clay must be used and is found in the Fez region of Morocco. Once found, in underground mines or open pits, this clay is soaked in water until it reaches a soft texture. The clay is then filtered by hand to extract impurities like rocks and branches. After filtering, a skilled craftsmen flattens the clay into square shapes by hand, ensuring it is compact and with no air bubbles in it. The square raw clay tiles are then sun-dried on a rooftop. After the tiles are well dried, another skilled craftsmen applies the glaze colors by hand, one-by-one, to only one side of the tiles. Once dried, the tiles are meticulously stacked in a natural olive-pit fired kiln. In these traditional Moroccan kilns heat circulates unevenly, imbuing each handmade tile with its own unique tone, texture, and color. This perfect imperfection is what sets Moroccan zellige apart from every other tile on Earth. Once fired, a skilled artisan will use a medieval tool called a ‘menkach’, a combination of an axe and hammer, to cut and shape each tile into the desired shape. This intricate process involves great patience and skill. The final result is Moroccan zellige tile with both tonal and size variation, along with small chips, pits and cracks that are to be cherished and celebrated.
How To
Installation
The production of zellige requires true craftsmanship. The maâlems (master craftsmen) start learning this niche process as apprentices. Historically used in geometric and floral shapes in the most beautiful palaces, zellige is only now becoming more widely available. Our craftsmen start with raw clay which they soak in water and hand filter for impurities. At this point, the clay becomes a soft, malleable substance that can be placed into various molds. These pieces are then placed side by side and left to dry in the bright Moroccan sun. The tiles are flattened and shaped by hand and left to dry further. Each tile is hand dipped in glaze and then methodically placed in an earthen kiln. Heat is distributed unevenly throughout the kiln which gives zellige gorgeous variations. Every tile is an expression of the artisan’s work that day—beautifully imperfect and unique. Lastly, the tiles are glazed and cut to perfection. Each tile is a piece of art in its own right. Traditional zellige tile will have approximately 15-20% of these perfect imperfections. If a more uniform look is desired, we suggest increasing the order size by 20-25% to reduce the amount of variation installed during installation. Then, set the control sample range of tile with your installer to only install tiles that fall within the desired color and texture range.
REQUIRED MATERIAL:
For placing the tiles:
- – Sponge
- – Bucket
- – Wedge Spacers
- – High quality medium-bed thinset mortar
- – Trowel
- – Mapei Ultracolor Plus FA Grout
- – Grout float
- – Tile cutter and/or water-cooled tile saw with diamond edge blade
INSTALLATION:
Laying zellige tiles:
- The surface should be well prepared and leveled before placing the zellige.
- Soak glazed zellige tiles in water for 1-2 minutes to ensure tiles properly adhere to tiling surface. Do not soak our Unglazed Natural zellige in advance.
- Evenly apply a layer of thin set to the tiling surface.
- Butter the back of each tile with another layer of thinset.
- Place tiles one by one into wall adhesive.
Zellige tile can be spaced in several ways based on design preference. The traditional (and recommended) method for installation does not use standard grout joints; 4×4 tiles are instead laid edge to edge while other shapes are laid by hand with minimal grout spacing.
Zellige tiles can be easily cut as needed with a traditional tile cutter and snapped apart. A diamond disc can be used for more exact cuts and mitered edges. Wedge spacers may be needed in areas to align naturally uneven edges. Grout open, uneven edges or gaps where they appear.
Grout specifications:
- Once the tiles are placed, spread grout with a rubber spatula, filling all spaces and gaps between the tiles and any surface pits, chips and cracks. The preferred grout specification is Mapei Ultracolor Plus FA grout. Unglazed zellige requires Mapei Flexcolor CQ grout.
- The grout color should be matched as closely as possible to the color of the tile.
- After a brief drying, carefully remove the excess grout with a damp sponge.
- Polish the tiles afterward to remove any remaining grout film.
- All grout should be sealed after installation.
- Zellige is a glazed terracotta that does not need to be sealed. For Unglazed Natural Zellige ONLY we recommend using a penetrating sealer to protect the tile prior to grout and again after grout as unglazed terracotta is porous and absorbent.
Zellige on floors:
2×6 glazed zellige are the preferred size and shape for floor installations. All unglazed zellige shapes can be used in floor applications due to their higher COF. Particular attention should be paid to the application of the adhesive on the floor and back of the tiles to ensure perfect bonding between the tiles and concrete slab.
Zellige in showers and swimming pools:
Zellige tiles are commonly used in pools, shower walls, fountains, spas, and bathrooms. Ensure that the surface of each area is stable and waterproof prior to starting the installation. Use adhesive cement and grout appropriate for use in wet areas. Pool installers should always seal pool and spa waterline grout lines after any tile install is complete, including zellige, due to continuous water exposure.
Our Unglazed Natural zellige is the only zellige tile that requires sealing. Seal the unglazed zellige once before grout with 511 Porous Plus which acts as a grout release, then again after grout is complete with Fila Matte Wax topical sealer following the sealant manufacturer’s application instructions.